AzmanL/Getty Images
Want a Full Body Challenge Without Any Weights? Try Chair Pose
These are the tips and variations you need to practice this standing posture, which is modifiable for all fitness levels.
By Amy Marturana Winderl•
What Is Chair Pose (Utkatasana)?
What Muscles Does Chair Pose Work?
What Are the Benefits of Chair Pose?
How to Properly Do Chair Pose
Chair Pose Mistakes to Avoid
Chair Pose Variations and Adjustments
Can Your Knees Bend Past Your Ankles in Chair Pose?
Practice: Try a Yoga Sequence with Chair Pose
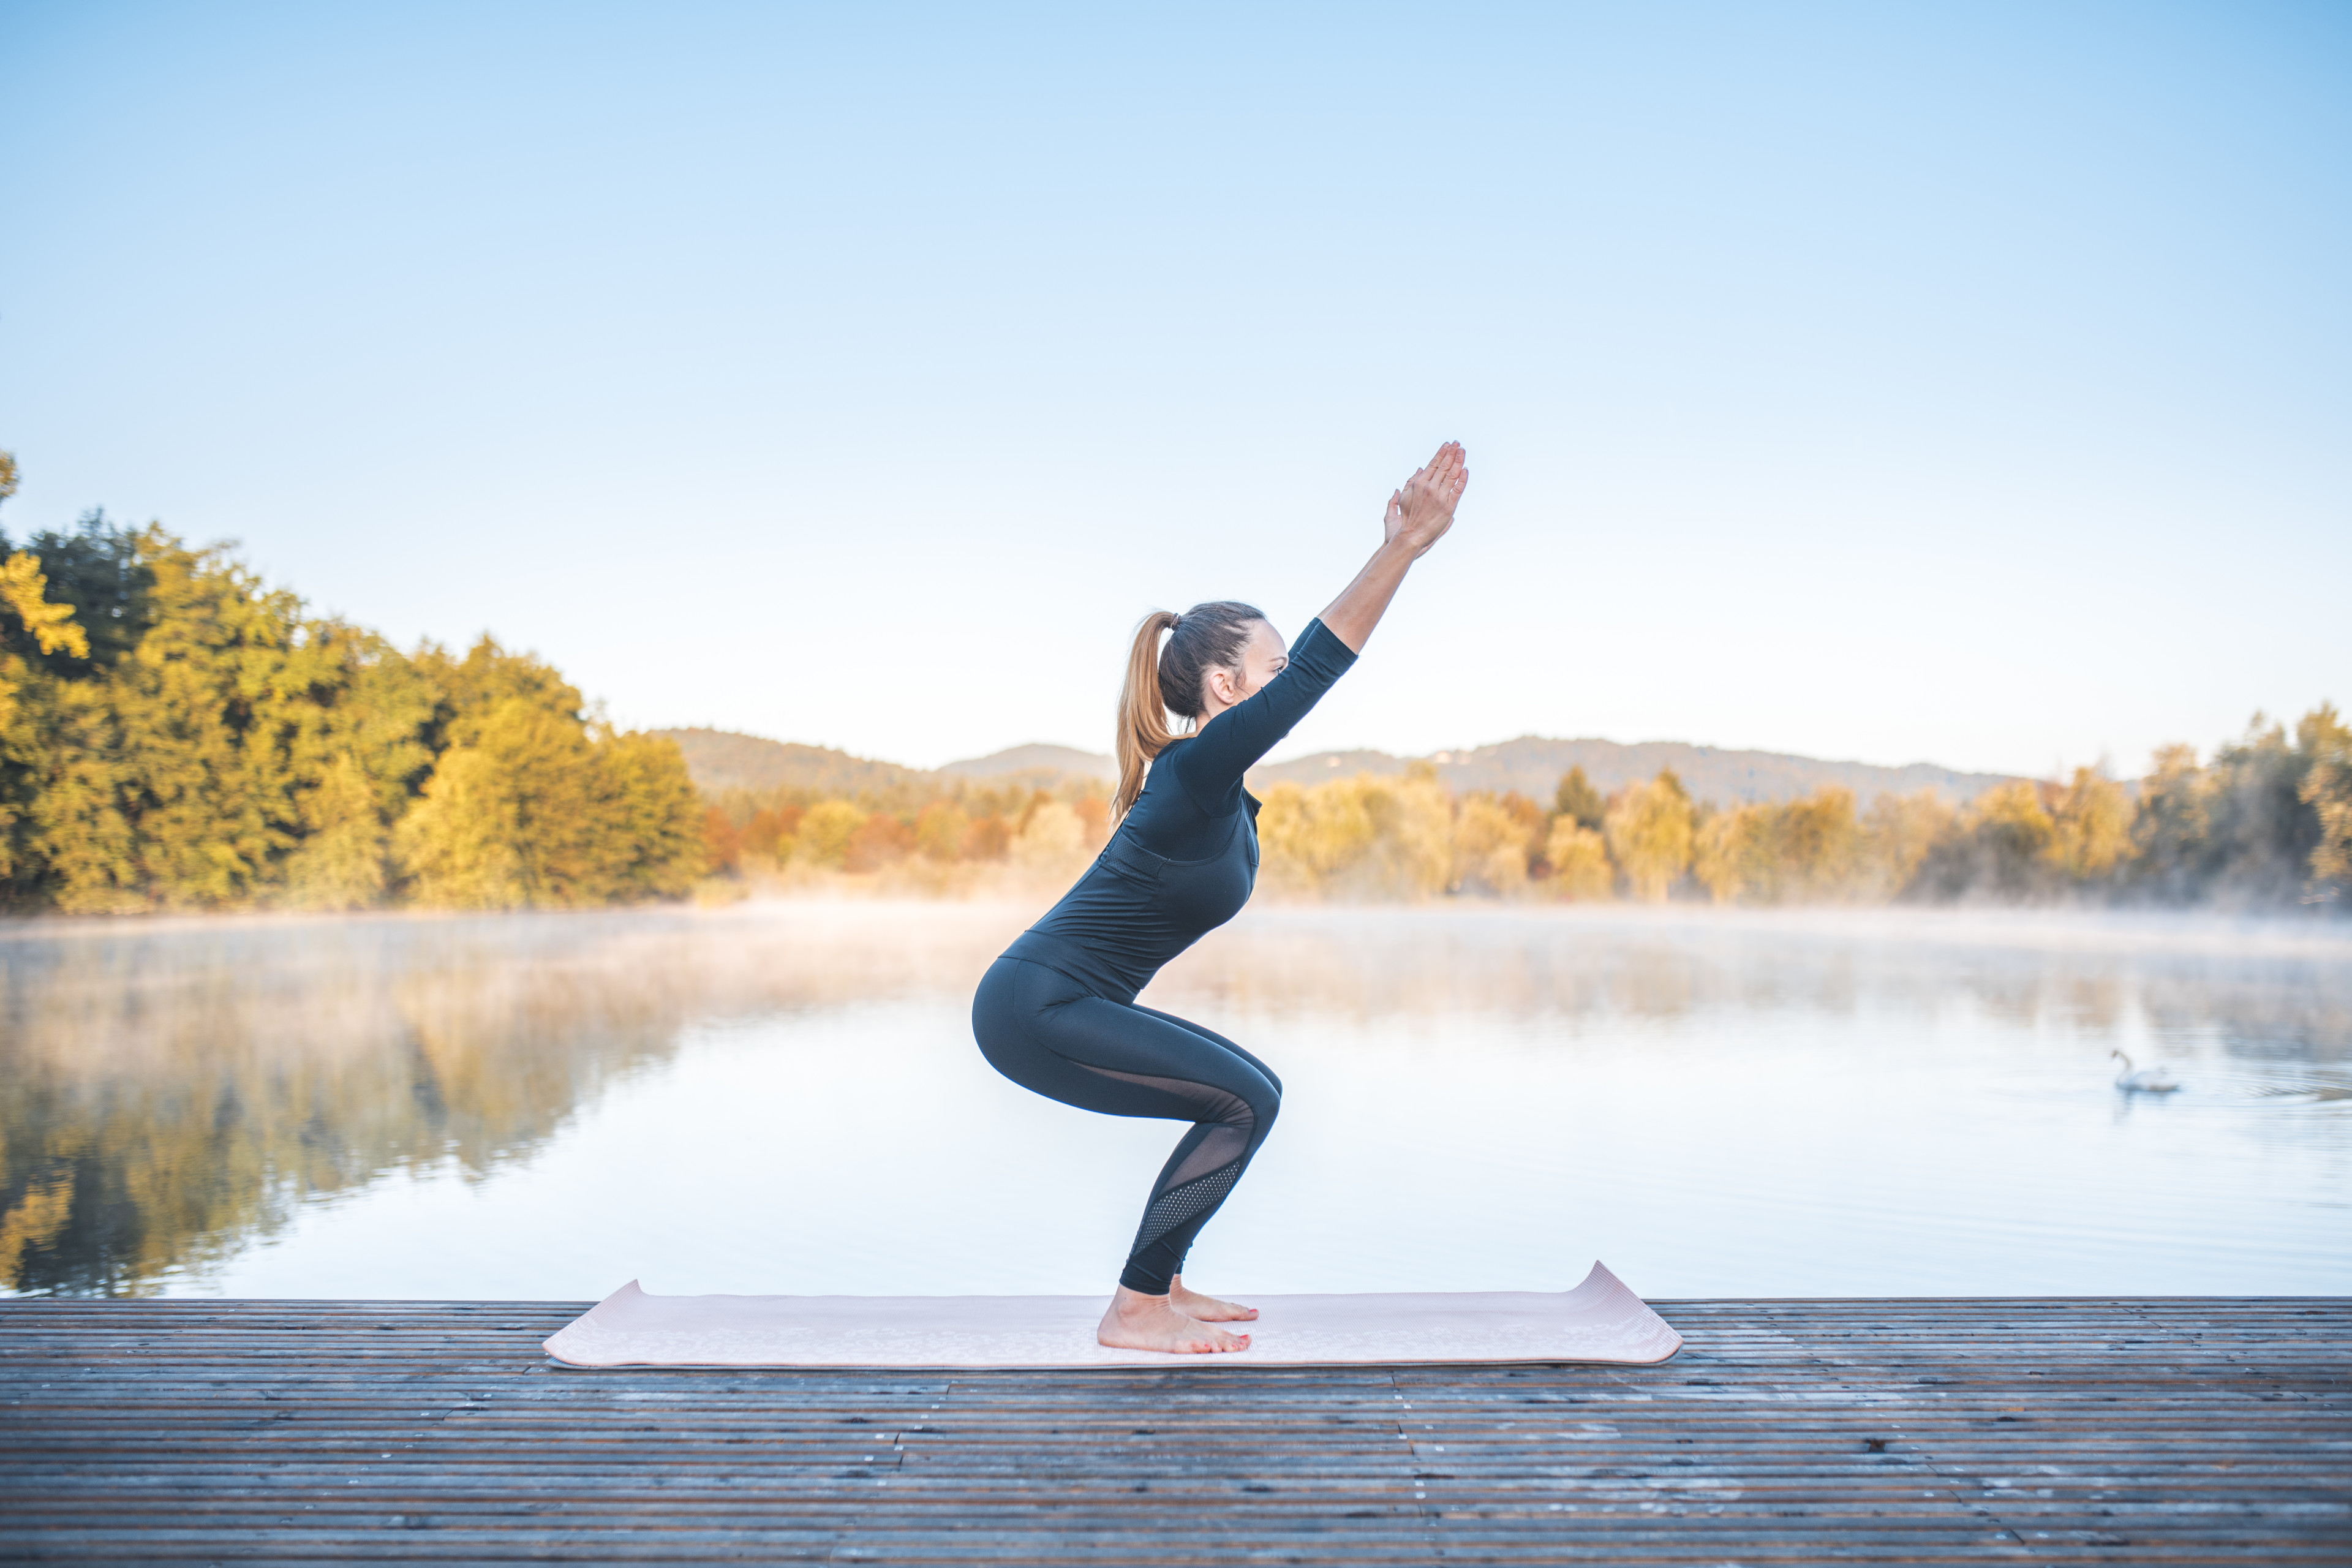
Upon first glance, Chair Pose, known as Utkatasana in Sanskrit, seems deceptively straightforward. Maybe you’ve even asked yourself, “How complicated can a mini squat with raised arms really be?” Don’t be fooled; This yoga pose is a full body challenge. When done correctly, it requires strength from your legs, core, back, shoulders, and arms.
Chair Pose pops up in many different types of yoga, so learning how to do it properly will help you feel prepared and confident on the mat (it'll also build strength that translates to your everyday life).
Here, Ross Rayburn, Peloton instructor, and Arlene Schmid, PhD, program director of occupational therapy at Colorado State University, share everything you need to know in order to safely and effectively practice Chair Pose.
What Is Chair Pose (Utkatasana)?
Chair Pose is a standing yoga posture that involves bending your knees and holding a partial squat, almost as though you’re sitting in an imaginary chair. Its Sanskrit name, Utkatasana, translates to “powerful ,” which probably makes sense if you’ve tried Chair Pose.
“Chair Pose is one of those postures that looks kind of simple, but it works most of the body and strengthens and stretches multiple parts at the same time,” Schmid says. “It’s a pretty modifiable yoga pose, which makes it great for beginners.”
Chair Pose shows up in a variety of yoga styles, but it’s especially common in Vinyasa, a type of yoga that links poses together in fluid sequences, coordinating your movements with your inhalations and exhalations. Chair Pose often comes after Mountain Pose (Tadasana) and before Standing Forward Fold (Uttanasana). However, its placement in a sequence varies depending on the class and instructor.
What Muscles Does Chair Pose Work?
While in Chair Pose, you work the following muscles and body parts:
Back, shoulders, and arms, which are activated when you reach your arms overhead.
Thighs, including your quads, which are in the front of your thighs; your hip adductors, which are in your inner thighs; and your hamstrings, which are in the back of your thighs.
Calves and ankles, which keep your body stable as you hold the pose.
Core, which also plays a key role in stabilizing your body and keeping your lower back from arching.
Pelvic floor, the group of muscles that support the organs in your pelvis, such as the bladder and uterus.
What Are the Benefits of Chair Pose?
Chair Pose offers a host of benefits. For starters, the strength you build by practicing this yoga pose can support healthy posture off the mat. So if you spend most of the day in front of a computer, doing Chair Pose can help counteract the “common rounded, tucked-under pelvis” that most of us experience while sitting all day, Ross explains.
Chair Pose also anchors your body—both energetically and physically. When you’re holding this pose, Ross recommends centering your thoughts on staying steady and focused. Keep in mind: The benefits of Chair Pose won’t arise overnight. As Ross points out, they require consistent practice and can vary from person to person.
How to Properly Do Chair Pose

Chair Pose works well in a sequence, but you can also do it in isolation as a full body strength training move. It’s also a great opportunity to practice breathing through a challenging pose. Here’s how to do it safely and effectively:
Start in Mountain Pose, a foundational yoga posture that involves standing tall with your feet about hip-width distance apart and your arms by your sides with your palms facing forward. If you want to do traditional Chair Pose, step your feet together to touch and keep them there. However, you can also place them hip-width distance apart to make it easier to lower your hips.
On an inhale, raise your arms overhead, keeping them in line with your spine, and turn your palms to face each other.
On an exhale, bend your knees to lower into a squat, allowing your torso to lean slightly forward over your thighs. Keep your core engaged and your spine neutral. Lower to a depth that feels challenging for you, Schmid says. The ultimate goal is for your thighs to be parallel to the floor, but be patient with yourself: It takes time and practice to get there.
Once you’ve reached a comfortable position, make sure your rib cage isn’t flared out and your lower back isn’t arched. To prevent these common errors, think about drawing your belly button up and in and slightly tucking your pelvis so that your butt is underneath you instead of protruding behind you, Schmid says. Hold this pose while you take five slow, deep breaths.
Push through your feet to return to your standing position.
Chair Pose Mistakes to Avoid
Like any yoga posture, you’ll get the most out of Chair Pose by focusing on your form. Because this posture engages your entire body, you have to keep tabs on a lot of things, from the bend in your knees to your hip position to the arch in your back. As Ross says, “Anything that takes you out of being able to find balance between stability and freedom is not optimal.” Here’s how to fix some of the most common mistakes people make while doing Chair Pose.
Hunching your shoulders. Keep your shoulders back and locked in place. “Make sure your arms are extended but that you don’t lift your shoulders up towards your ears,” Schmid says. “That will activate more of your neck and the back of your shoulders, which aren’t the muscles we want to activate.”
Arching your back. If you feel any pressure in your lower back, give your glutes a tiny tuck (squeezing your butt can help). This small movement will ensure you’re engaging the correct muscles and protect your lower back from arching, Schmid says.
Sinking too deep or not deep enough. Instead of trying to lower to any specific depth or angle, focus on bending your knees until you hit a spot that feels challenging to hold. This position is where you want to stay as you breathe through the pose.
Failing to engage your inner thighs. Placing a yoga block between your thighs can help you make sure you’re engaging your legs and pelvic floor as much as possible, Schmid says. “You don’t want to be just hanging out,” she says. “It’s a very active pose.”
Chair Pose Variations and Adjustments
Consider these variations to make the posture more or less challenging.
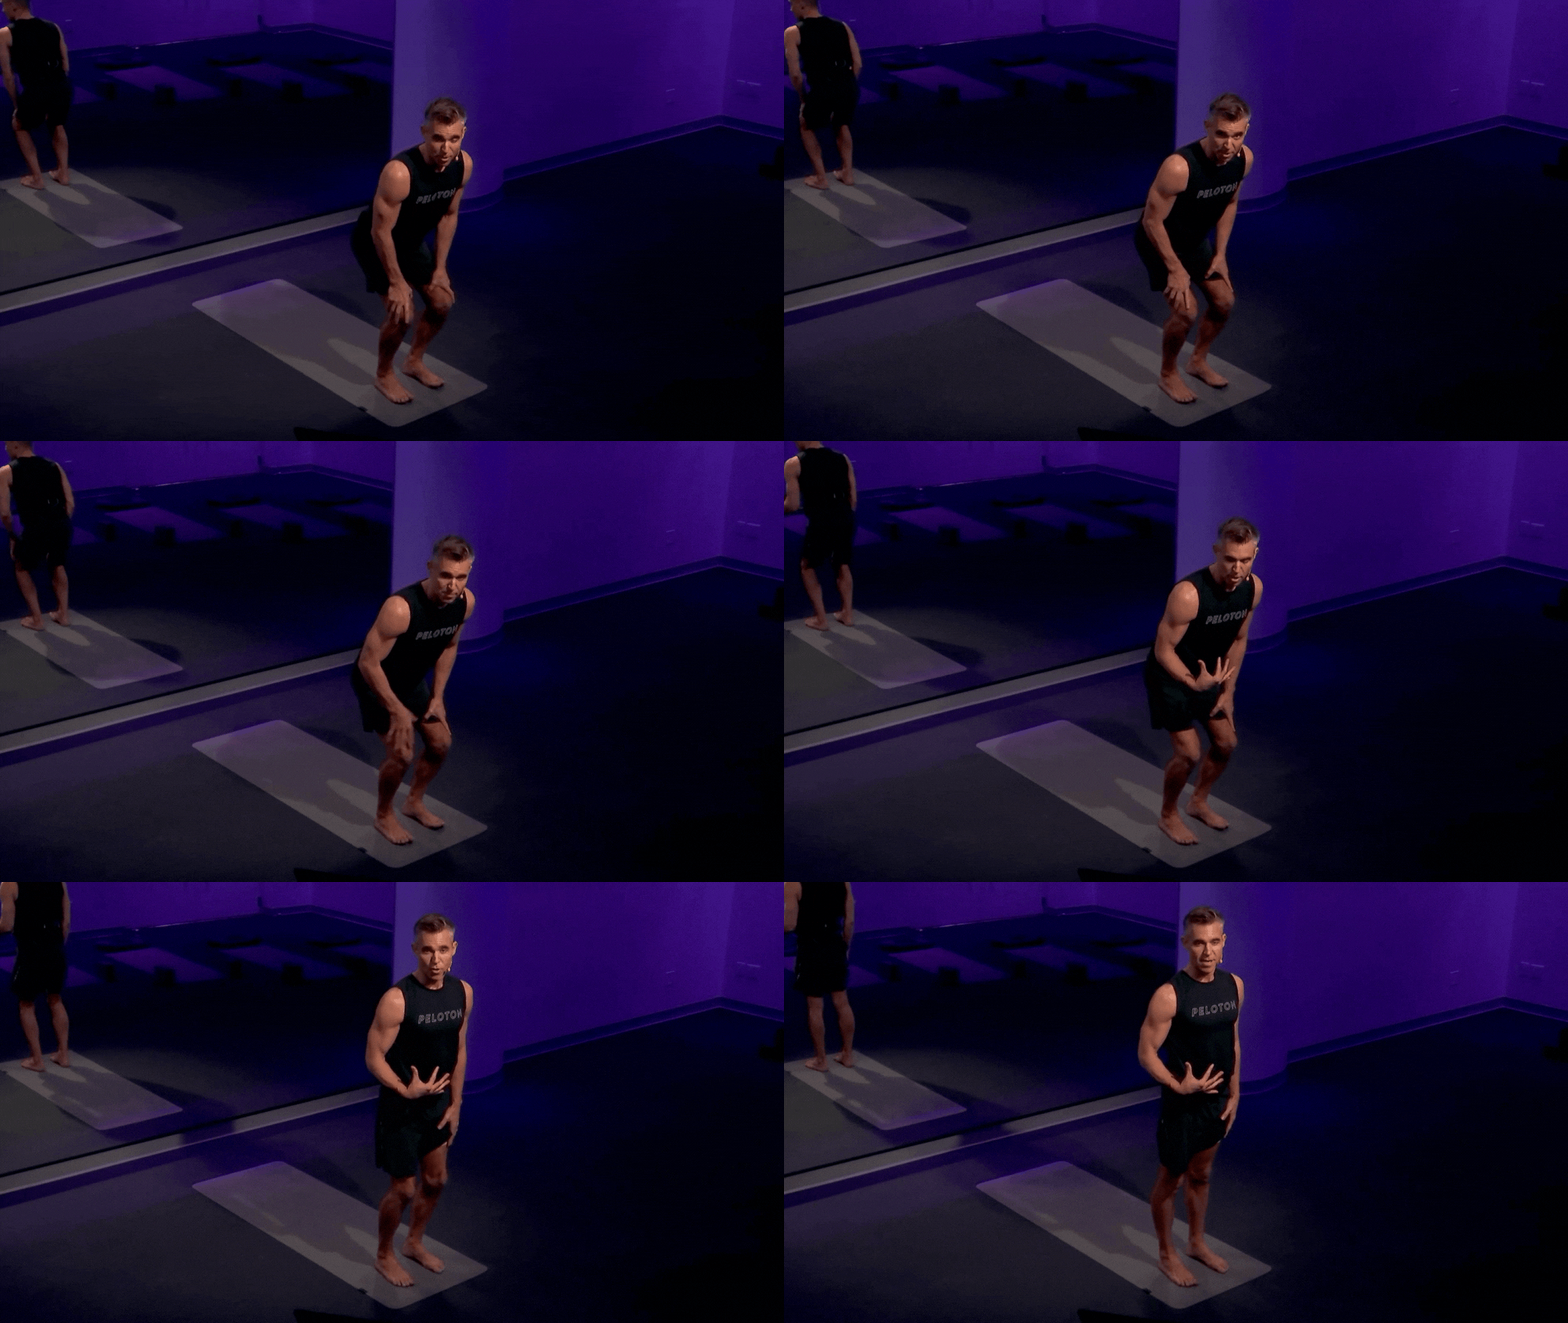
Beginners: Chair Pose with Hands On Thighs
“Modified Chair Pose is one of my top three favorite yoga poses,” Ross says. To do this posture, separate your feet hip-width distance apart and place your hands on your thighs or knees instead of holding them overhead.
“Any time the arms are up, it takes mental and physical attention away from what I personally consider the more important and efficacious elements of this shape,” Ross explains, also noting that having your arms overhead “can throw off your balance.” By keeping your hands on your thighs or knees, you can focus your attention on your foundation.
Another option is to place a chair in front of you and hold onto it while in Chair Pose. “Holding onto the back of a chair or even a countertop supports your balance and makes it easier for your upper body until you’re ready to hold your arms up,” Schmid says.
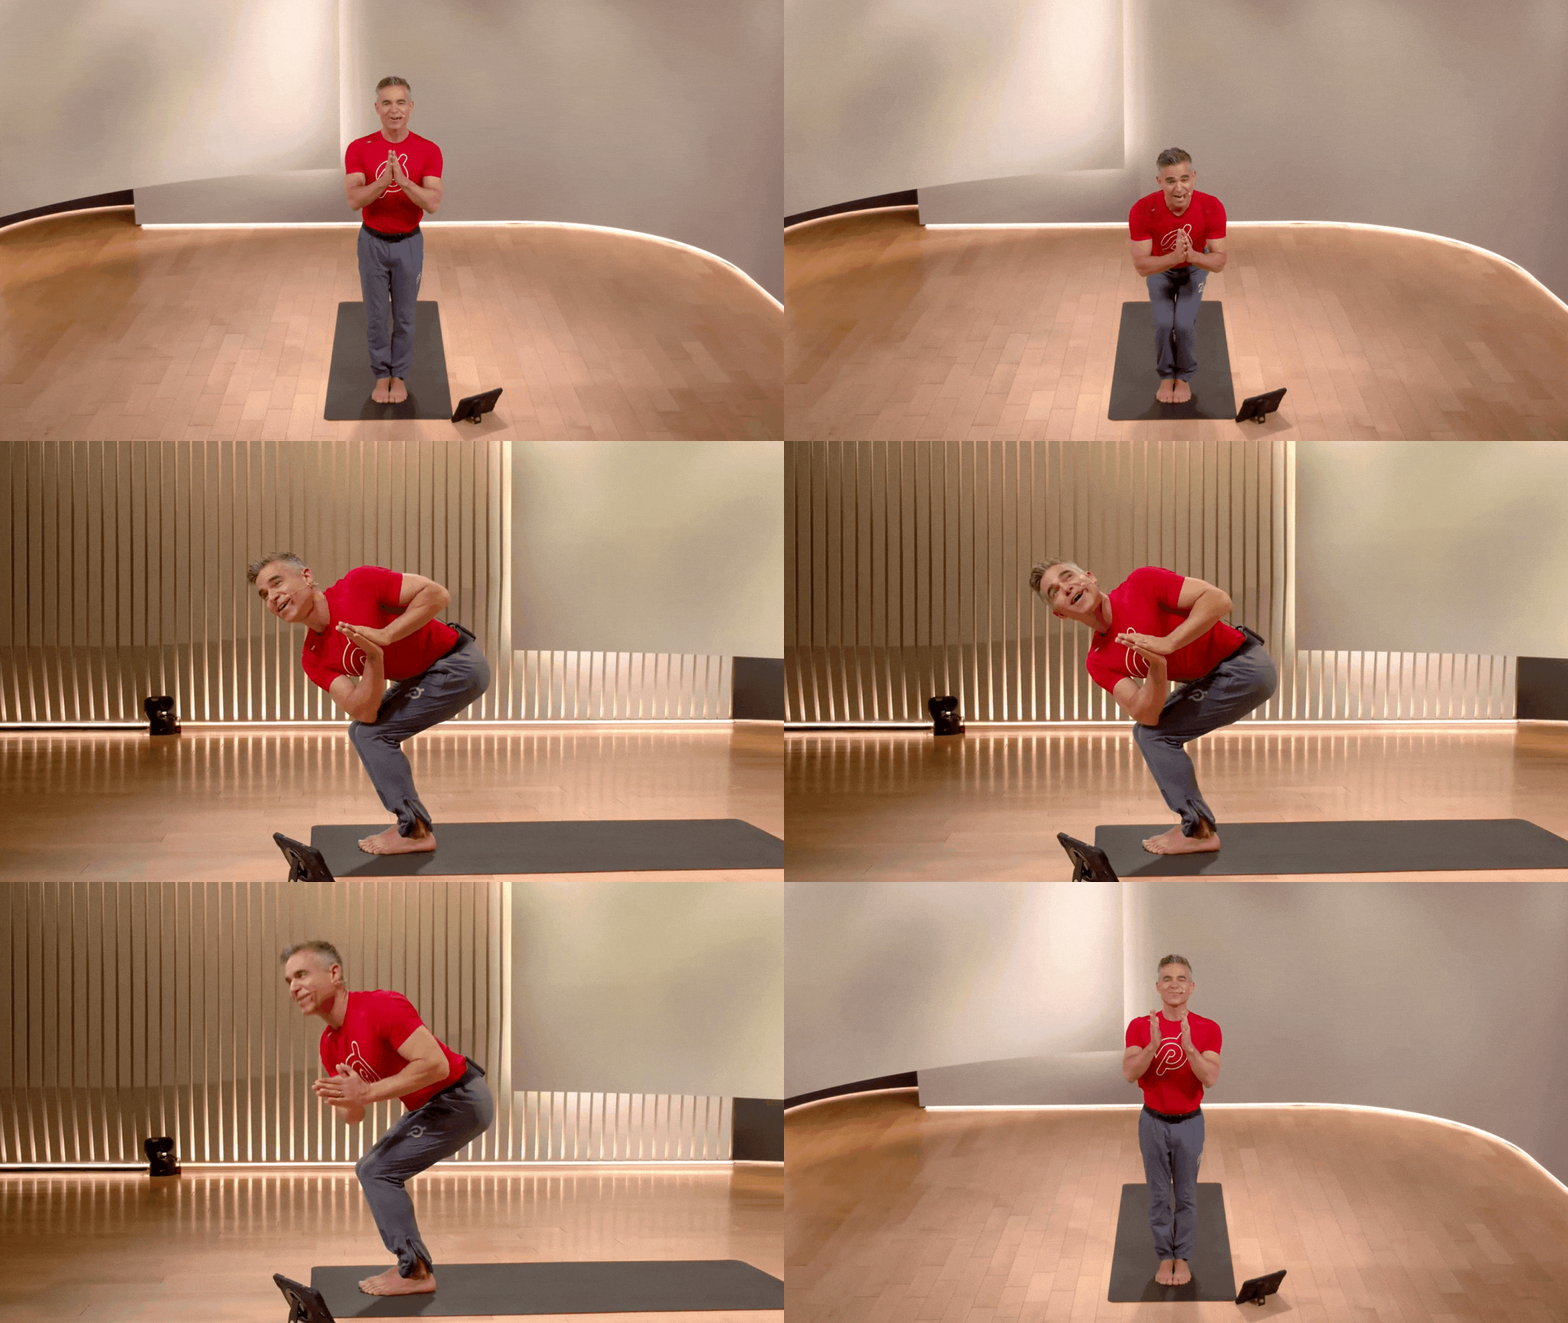
Intermediate: Revolved Chair Pose (Chair Pose with Twist)
This variation adds an upper body twist to the mix, engaging more of your core and challenging your balance, Schmid says. Holding this twist fires up your obliques (the abdominal muscles on the sides of your torso) while also stretching and opening your upper back and shoulder blades. Here’s how to do it.
Start in Chair Pose. Bring both palms together at your chest in a prayer. Gently twist your upper body to the right until your left elbow touches the outside of your right thigh.
Keeping your palms pressed together, turn your head to look up at the ceiling.
Hold this position for three to five breaths.
Return to the center before repeating this movement on the other side.
Advanced: Single-Leg Chair Pose
Try this variation for a more intense strength and balance challenge.
Before you bend your knees and lower into Chair Pose, shift all of your weight onto one foot.
Cross the opposite ankle over your knee, like you’re doing a figure 4 stretch.
Lower into Chair Pose and hold this position for three to five breaths.
To transition to the other side, Schmid suggests rising and bringing your non-standing leg up toward your chest until your hip and knee are both at 90 degrees. Then, place that foot back on the floor and switch sides. “This adds even more balance and strength work,” she says.
Can Your Knees Bend Past Your Ankles in Chair Pose?
Yes, it’s OK for your knees to bend past your ankles in Chair Pose (in fact, they probably will). Just be mindful of your toes as well. Unlike squats, where you’re told to “keep your knees behind your toes,” the goal in Chair Pose isn’t to bend your knees as deeply as possible, Schmid says, so there’s not much of a chance your knees will fall too far forward.
If your knees are bending past your toes in Chair Pose, you’re likely no longer maintaining proper form. To fix this, soften the bend in your knees, hinge your hips forward, and straighten your spine.
Practice: Try a Yoga Sequence with Chair Pose
Practicing Chair Pose on its own is a great way to get comfortable with the posture, and once you feel confident in your form, try it as part of a flow. To get started, Peloton App users can take Ross’ 20-minute Yoga Flow, which includes Chair Pose. This class is short but effective—the perfect combination when you’re starting a new yoga practice.

Peloton App
Access thousands of classes with no equipment needed.
This content is for informational and educational purposes only and does not constitute individualized advice. It is not intended to replace professional medical evaluation, diagnosis, or treatment. Seek the advice of your physician for questions you may have regarding your health or a medical condition. If you are having a medical emergency, call your physician or 911 immediately.
Level up your inbox.
Subscribe for a weekly dose of fitness, plus the latest promos, launches, and events.
By providing your email address, you agree to receive marketing communications from Peloton.
For more about how we use your information, see our Privacy Policy.
