Westend61/Westend61 via Getty Images
How to Practice Lotus Pose for More Open Hips
This foundational yoga pose can be challenging, but the good news is that modifications and other poses can help you make the most of your own Lotus.
By Elizabeth Millard•
What Is Lotus Pose In Yoga?
Benefits of Lotus Pose
How to Do Lotus Pose
Common Mistakes to Avoid In Lotus Pose
Top Tips for Nailing Lotus Pose
Variations to Lotus Pose
Everyone is familiar with sitting cross-legged on the ground, so in some ways, you've already been halfway to Lotus Pose without even realizing it. For the full posture, you're adding on to that position by bringing each foot closer toward the body, almost into your hip creases.
This might sound like a simple instruction, but Lotus Pose is challenging for many people since it requires flexibility in the hips and legs. Below are some tips on finding the Lotus Pose that works best for you, along with some postures that can help you work up toward the full Lotus Pose.

Peloton App
Access thousands of classes with no equipment needed.
What Is Lotus Pose In Yoga?
Also known by its Sanskrit name of Padmasana, Lotus Pose is designed to be used for meditation since you tend to sit in the posture for a longer period than other poses. Each foot is placed on the opposite thigh, making the knees look like the petals or leaves of a flower, with the upper body resembling a central bud or bloom.
Benefits of Lotus Pose
Whether you're doing the full pose or a Half Lotus variation (more on that below), the benefits can be the same, according to Peloton Yoga instructor Nico Sarani.
"It's a wonderful meditation position because you keep the spine erect, and that has a grounding, stable sensation that lets you relax into it," she says. "It can also help with opening the hips, which creates more flexibility."
How to Do Lotus Pose

Prostock-Studio / iStock / Getty Images Plus via Getty Images
Here are the steps for a standard Lotus Pose from Nico:
Sit on the floor or your mat, with legs straight. This is sometimes easier for getting into the pose compared to a cross-legged position.
Bend your right knee and hug it in toward your chest. Let that knee “fall” to the side, towards the floor, opening the hip as you do so. Your shin and thigh stay close together.
Bring your right foot onto your left thigh, with the right ankle in toward the left hip crease.
Bring your left shin as close to your thigh as you can get it in this position, bringing your left thigh towards the floor as much as possible before picking up your left foot and placing it onto your right thigh/groin. "It's important to not have the ankles collapse inward too much, if this happens (or if you feel any knee pain at all) it's better to stick to Half Lotus Pose or a simple crosslegged position as an alternative," says Nico.
Sit up fully with shoulders relaxed. Hands can go in toward your feet or extended to your knees.
Hold the posture for 30 seconds to a minute, or longer if you're using the posture for meditation.
"If you're comfortable, you can stay in Lotus Pose for as long as you like," Nico adds. "This pose is great for meditation, so if you're working toward that, you may gradually increase the length of time you stay in this pose."
Common Mistakes to Avoid In Lotus Pose
Just because a pose comes with potential benefits like the ones listed above doesn't mean you need to push through any pain or discomfort to get there, says Nico.
"Pay attention to whether your ankles are collapsing inward too much, or if you're feeling any knee pain at all," she suggests. "Listen to your body and choose an alternative if it's not working for you."
Another common misstep is to put Lotus Pose into a practice too early, Nico adds. Full Lotus Pose requires mobility in the hips, and a proper warmup can help you get there.
It's also important to remember that Lotus Pose is not appropriate for everyone, she says. For example, you should avoid the pose if you have knee or ankle injuries, hip problems, or you simply feel a sensation of pain or pulling in the pose.
Top Tips for Nailing Lotus Pose
In addition to warming up thoroughly before trying the pose, other tips that Nico recommends are:
Using blocks or other props; for example, you can put a block under each knee when they're bent to alleviate tension in the legs and hips. You can also sit on a cushion or folded blanket to help elongate the spine.
This may seem like a pose that fires up the lower body, but it's actually a whole-body pose because you should be focusing on keeping the spine straight.
Relax the shoulders and the face, which will also take tension out of the hips.
Remember to deepen your breathing and avoid holding your breath, since that will tighten your muscles.
Variations to Lotus Pose
Half Lotus
If bringing your feet up onto opposite things feels too difficult, particularly if it's straining your knees, consider doing Half Lotus instead. Here's how to do that pose:

Sit on the floor, on a mat. You can also sit on a cushion so that the hips tip forward slightly, which makes it easier to get into the pose.
Bring the legs into a cross-sitting position.
Lift your left foot onto your right thigh while leaving your right foot on the ground.
After 30 seconds to a minute, switch sides so your left foot goes back on the ground and your right foot comes onto your left thigh.
If you're comfortable in full Lotus Pose and want to increase the challenge of the pose, consider adding a bind in the upper body. This means bringing your arms behind you and either interlacing the fingers at your lower back or taking reverse prayer hands—bringing the palms together against your back, with the fingertips touching between the shoulder blades.
When you're looking to work up toward full Lotus or to feel more relaxed in the pose, doing some hip-opening poses beforehand can be helpful. Consider doing these as a sequence before settling into your Lotus Pose.
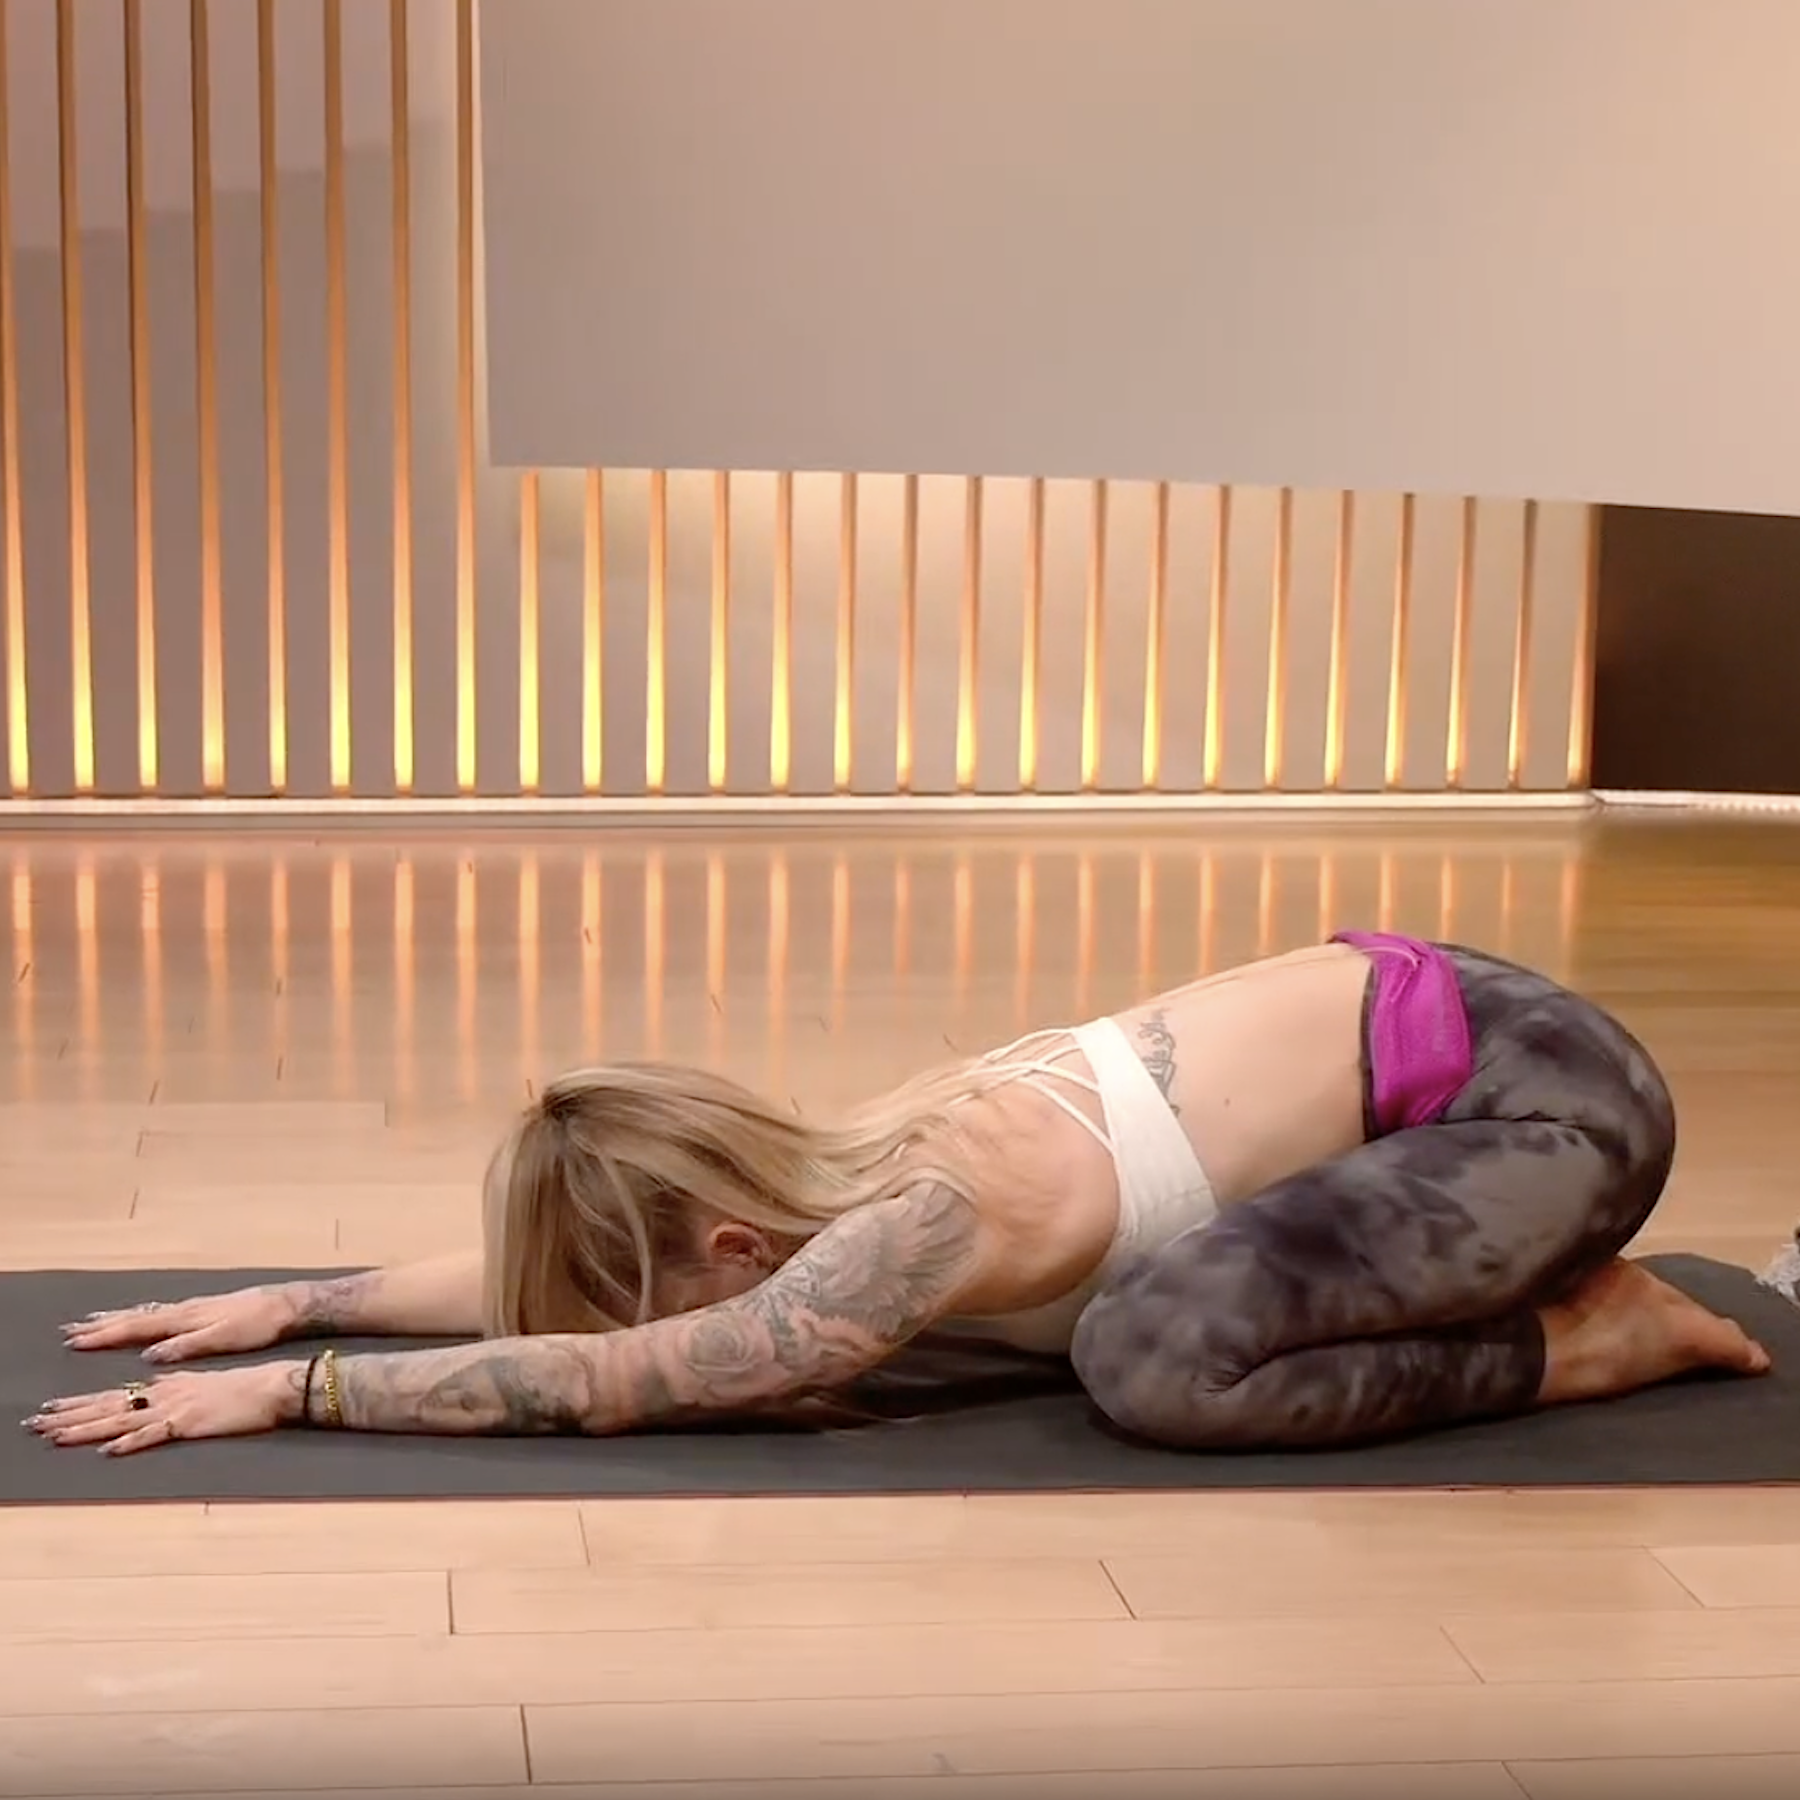
Child's Pose
This can be a good starting point for creating gentle stretch in the hips while deepening your breathing.
Come to your hands and knees on the mat.
Spread your knees as wide as your mat, keeping the tops of your feet on the floor with the big toes touching.
Rest your belly between your thighs and place your forehead on the floor. You can also stack your hands in front of you and put your forehead on top if that's more comfortable.
If you're not stacking your hands, stretch your arms in front of you with the palms toward the floor or with palms up, whichever feels better to you.
As you rest in this pose, pay attention to deepening your breath and softening during the exhales.
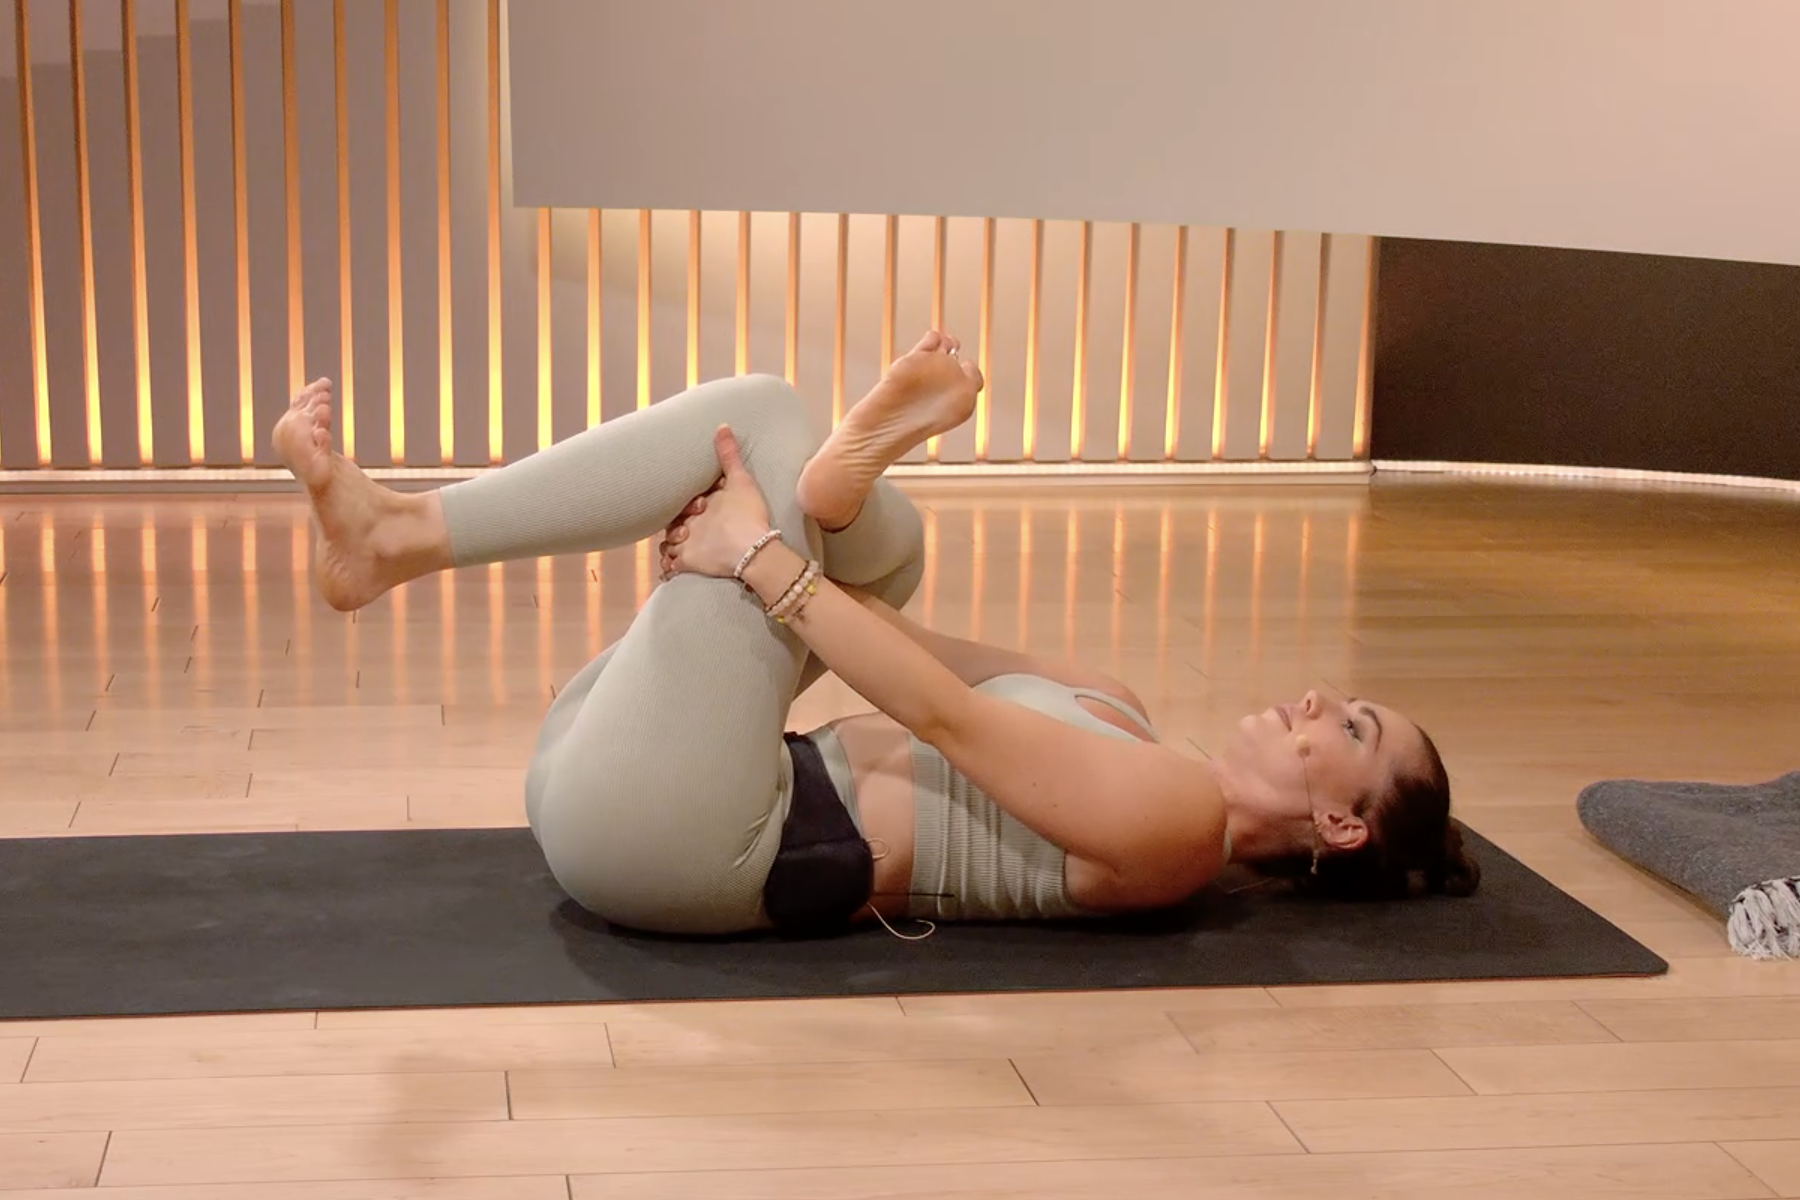
Reclined Pigeon Pose
This pose is geared toward releasing tension in the hips, which can help you ease into Lotus Pose more easily.
Lie on your back with knees bent and feet on the ground.
Cross your left foot over your right quad, placing the left ankle under the right knee.
Lift the right foot so the shin is parallel to the ground.
Hold the back of your right leg and gently pull it toward your chest.
When you feel a comfortable stretch, hold there for one to three minutes.
Switch sides and repeat.

Revolved High Lunge
On its own, a lunge is a boon for leg muscles, and when you throw a twist into the mix, it can offer strength in the hips as well.
Stand with feet hip-distance apart.
Step your left leg backward until you're in a lunge position, with right knee bent at a 90-degree angle.
Lean forward from the waist toward your right leg and twist toward the right, putting your left hand on the ground or on a block. Your left hand can extend toward the ceiling or wrap backwards onto your low back to open your shoulders more fully.
Hold that side for three to five breaths, then switch sides.
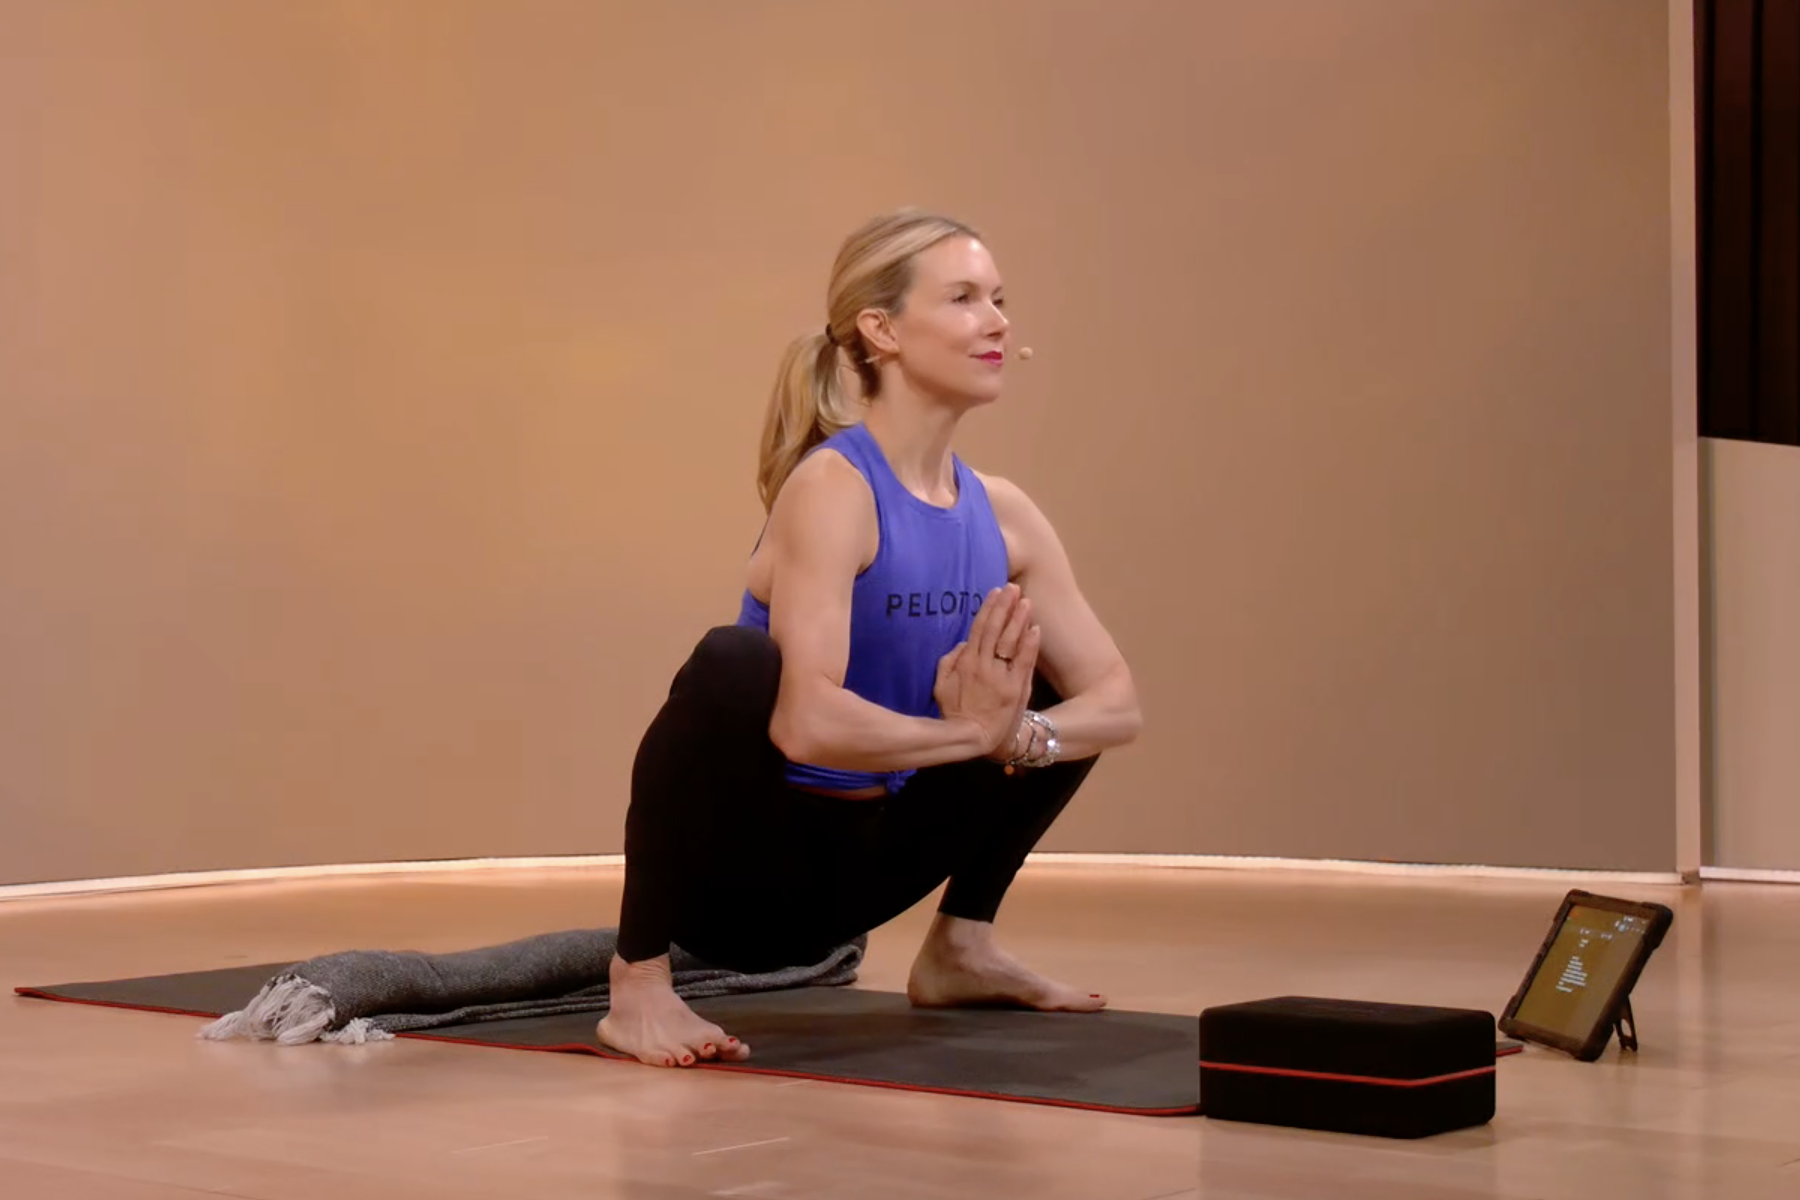
Garland Pose
Getting into a deep squat like this can help open up the hips, in a way that reduces muscle tension.
Stand with feet slightly turned out and hip-width apart, but they may be further apart if that's more comfortable.
Bring your palms together at the center of your chest.
Bend your knees and lower toward the mat to squat down as much as you can.
Try to keep your heels on the floor, but if they lift up, that's fine. You can also place a rolled-up towel or mat under your heels as you squat.
Shift your hips back so your tailbone reaches toward the mat and roll your shoulders back and down so your chest expands.
Stay between 20 to 30 seconds or for just a few breaths before you push down into your feet in order to rise back to standing.
Recommended
Peloton App
Access thousands of classes with no equipment needed.
This content is for informational and educational purposes only and does not constitute individualized advice. It is not intended to replace professional medical evaluation, diagnosis, or treatment. Seek the advice of your physician for questions you may have regarding your health or a medical condition. If you are having a medical emergency, call your physician or 911 immediately.
Level up your inbox.
Subscribe for a weekly dose of fitness, plus the latest promos, launches, and events.
By providing your email address, you agree to receive marketing communications from Peloton.
For more about how we use your information, see our Privacy Policy.
