How to Do a Hollow Hold—Plus All the Muscles It Works
We know this move is hard to do. Here’s why you should try it anyway.
By Kells McPhillips•
Benefits of a Hollow Body Hold
How to Do a Hollow Body Hold
Other Variations of a Hollow Body Hold
Common Mistakes Made in Hollow Hold
How To Add A Hollow Hold To Your Workout
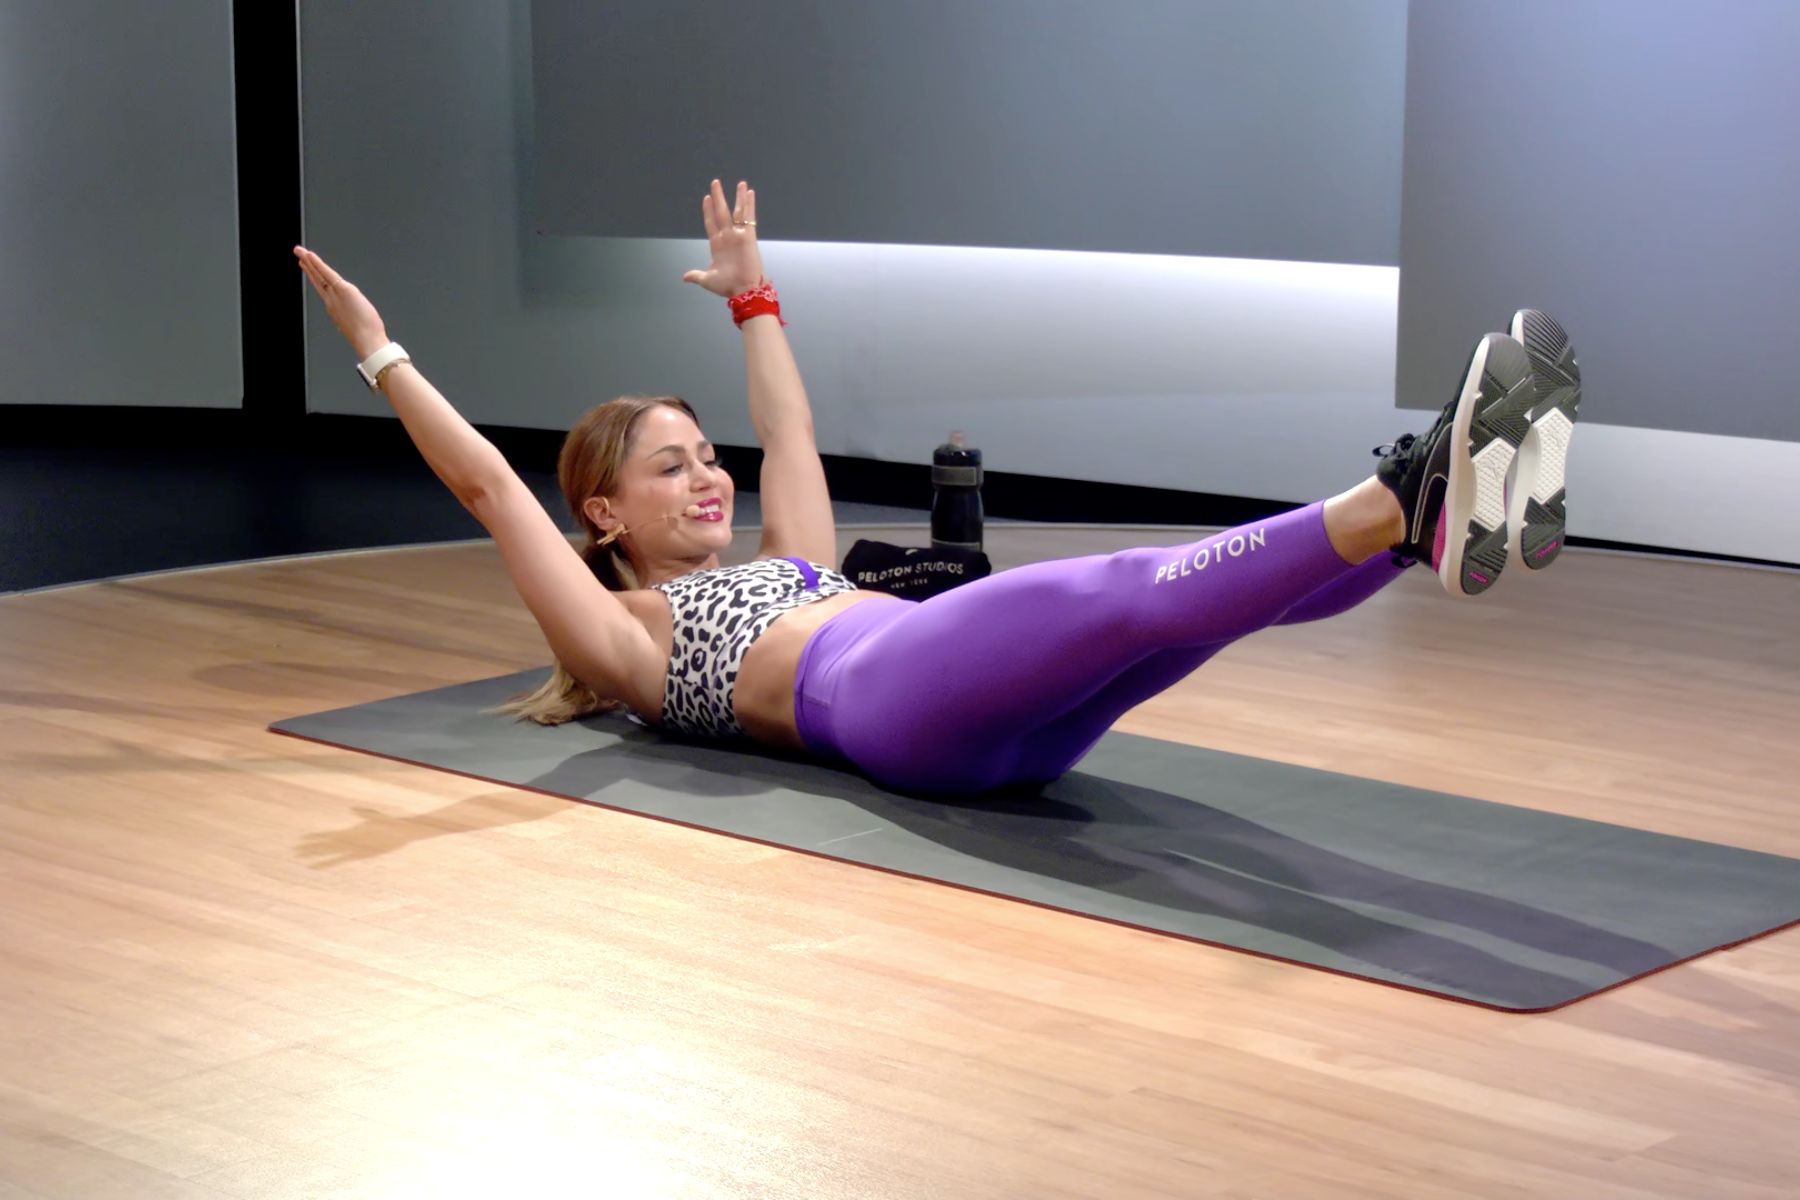
Sometimes, the simplest strength training move brings the most heat (see: planks and pull-ups). Hollow holds—the sneaky Pilates move that will leave your abs burning—is yet another example. In practice, a hollow hold involves lying on the ground and lifting your legs, back, and head—but it’s way more challenging than it sounds.
Still, hollow holds are worth it. Programming them into your core work rotation can help you build functional fitness, better your posture, and prevent lower body injuries. Below, Peloton instructor Olivia Amato explains the basics of the move, plus how to modify and incorporate it into your weekly workout slate.
Benefits of a Hollow Body Hold
Hollow holds work your midbody or trunk, the group of muscles encompassing your stomach, pelvis, lower back, and hips. “The hollow hold is a bodyweight, intermediate to advanced abdominal workout that really targets the muscles in your core,” Olivia says. While this move isn’t necessarily beginner-friendly, it can be modified to suit people of all fitness levels.
And no matter your fitness level, hollow holds are a great addition to your exercise arsenal. “Hollow holds help increase stabilization and strengthen your core and lower back muscles,” says Olivia. Having a stable midsection will help you perform a whole slate of functional movements—from standing up to carrying groceries—with ease. “For example, if you're picking something up and you have a strong core, you're going to be using your core instead of your lower back. If you’re using your lower back, you could hurt it. So [a strong core] helps to prevent injury—in exercise and in everyday life,” Olivia says.
A muscular midsection may also improve your posture and boost your athletic performance. In other words, there are many reasons to program hollow hold into your next workout.
Muscles Engaged in Hollow Body Hold
So we’ve already established that hollow holds work the muscles of your core—but what particular muscles are we talking about? Let’s start from your head and work our way down.
First, because you’re holding your arms parallel to your ears, this exercise engages the muscles of the neck, the deltoids (the muscles attaching your arms to your body), and the pectoral muscles (the muscles on the front of your chest).
In the torso, hollow holds light up the rectus abdominis (or your external “abs”), the transverse abdominals (the deeper “abs” that wrap around your entire midbody), and your obliques (two pairs of muscles on the sides of your torso).
Finally, hollow hold works your quads, hip flexors, and lower back as you fight to keep your legs hovering off the ground.
The bottom line is that hollow holds are practically a full-body exercise, so get ready to sweat, shake, and get stronger.

How to Do a Hollow Body Hold
Hollow holds may look simple, but they’re surprisingly challenging. When you’re starting to add them to your rotation, go slow and start with the modifications before working your way toward the full move.
Below, Olivia explains how to complete a hollow hold safely from start to finish and what modifications are at your fingertips.
Performing a Hollow Hold, Step-By-Step
Start by lying down on the floor with your legs extended and your arms long by your sides.
Tuck your pelvis under so your lower back is on the mat. You shouldn’t be able to fit anything between your lower back and the mat.
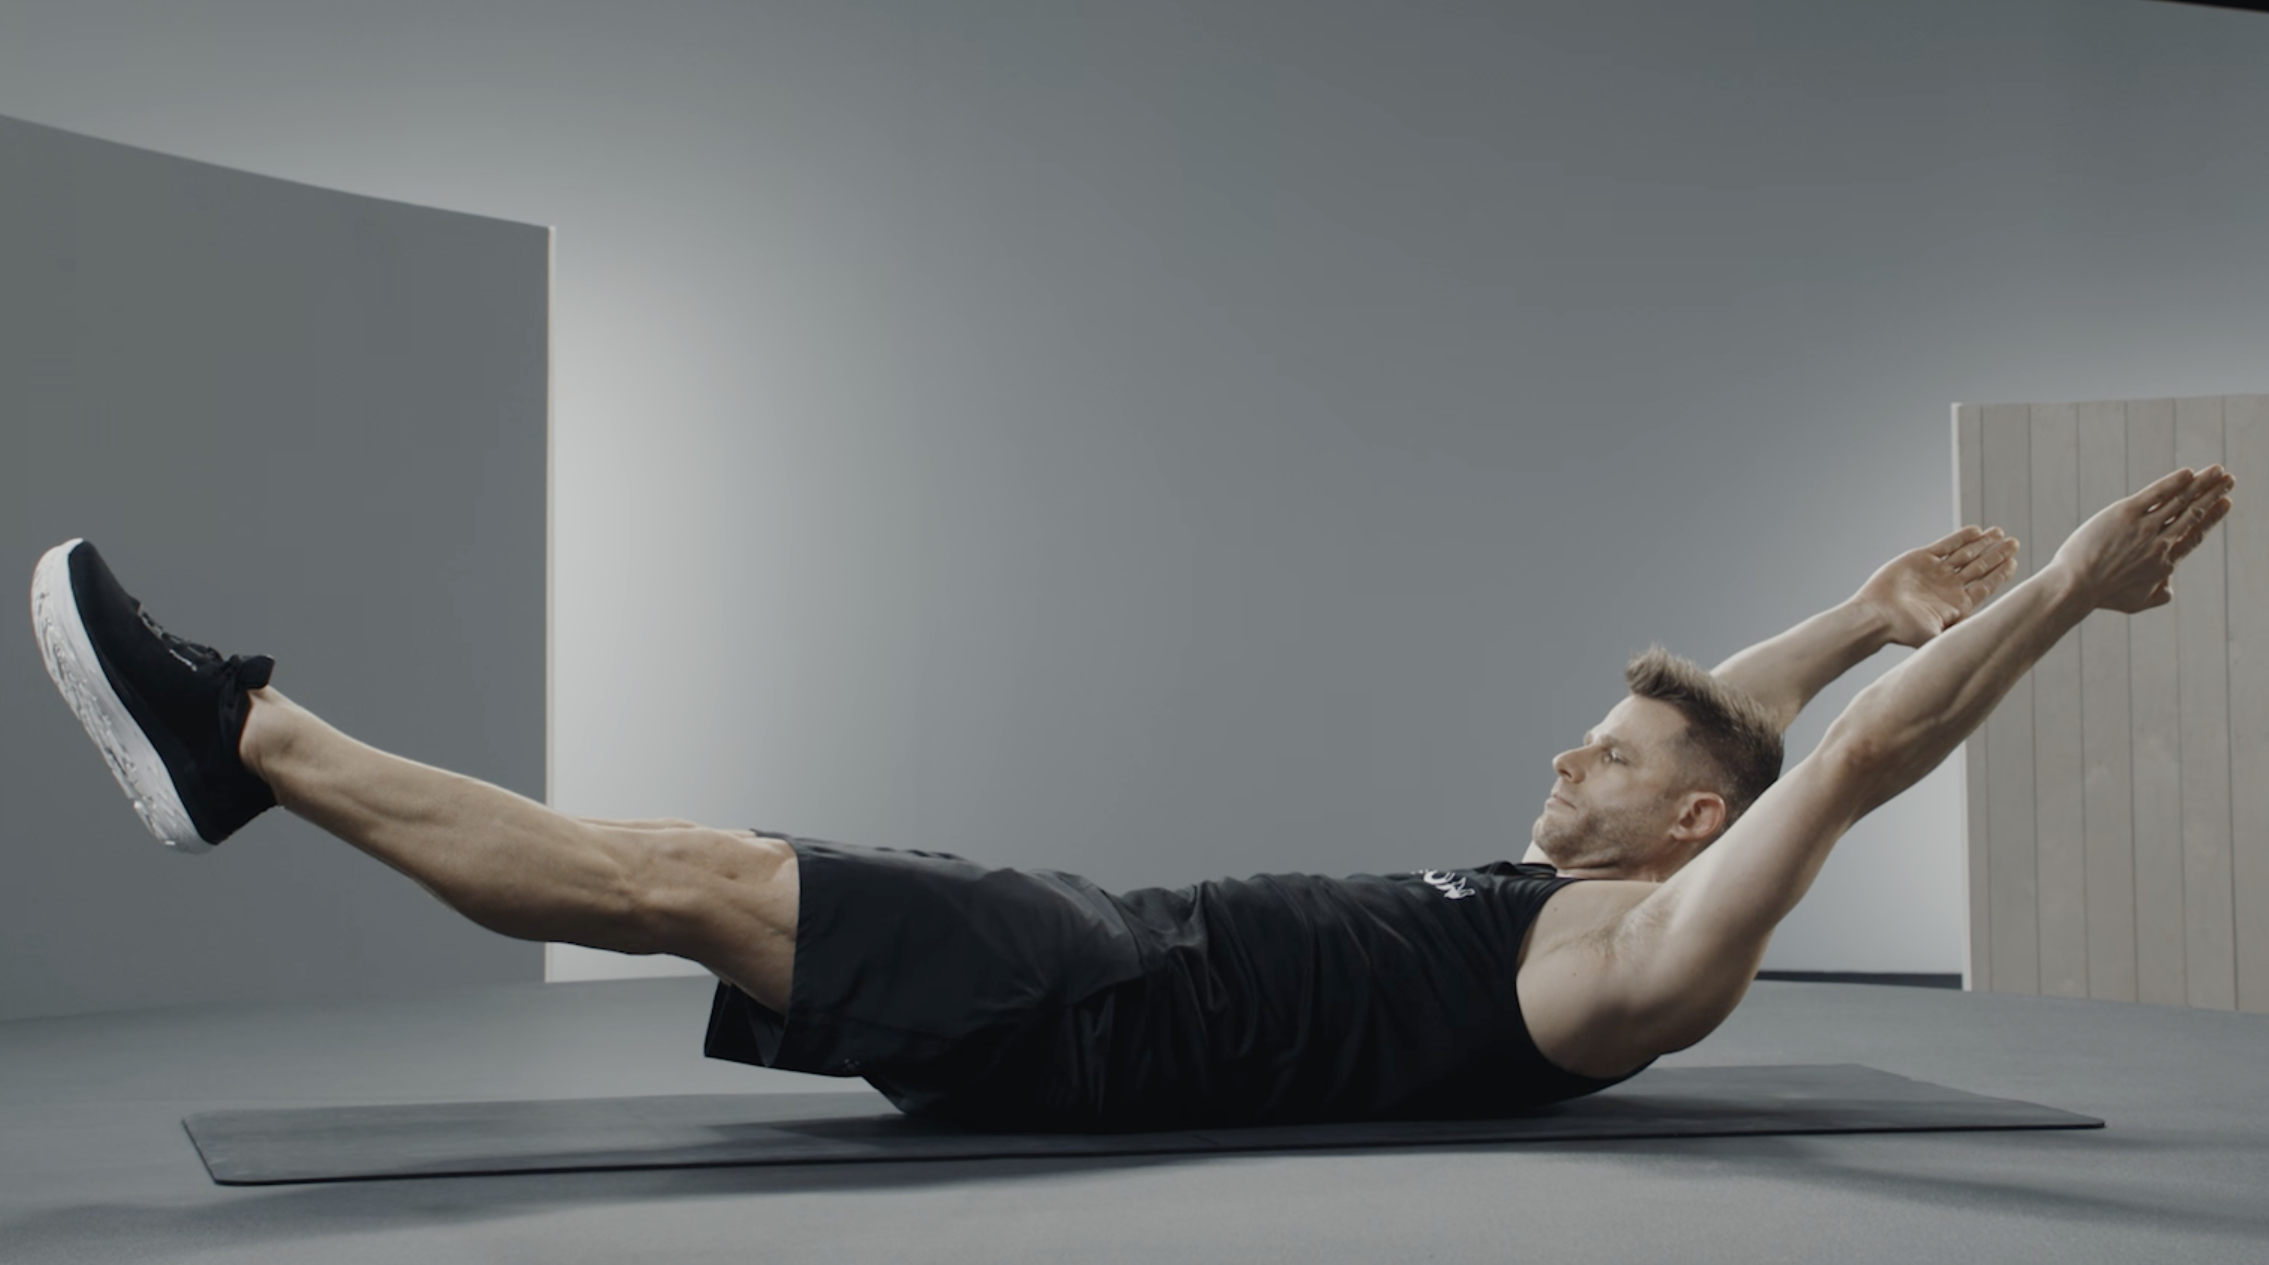
Start by hovering one leg long, then extend the other leg to join it. After that, extend both arms alongside your ears and lift your head, neck, and shoulders off the ground. Your body should resemble a canoe.
Hold for 10 seconds (working your way up to longer time periods as you progress).
Other Variations of a Hollow Body Hold
If you can’t keep your lower back on the ground or you’re finding it difficult to remain in the hollow hold position, Olivia recommends modifying the workout. Below, check out variations that range from beginner to intermediate.
Dead Bug
Start lying down with both feet on the mat and your knees bent.
Tuck your pelvis under so your lower back is on the mat. You shouldn’t be able to fit anything between your lower back and the mat.
Keeping your knees bent, lift your feet and bring your legs to hover over the mat with your shins horizontal to the ground. Extend your arms straight up to the sky.
Lower your left arm above your head so it hovers above the ground; lower your right leg so it hovers an inch from the ground. Return to center, then lower your right arm and left leg.
Continue alternating sides for 10 seconds (working your way up to longer time periods as you progress).
Feet on the Floor Modification
Start lying down with both feet on the mat and your knees bent.
Tuck your pelvis under so your lower back is on the mat. You shouldn’t be able to fit anything between your lower back and the mat.
Extend both arms alongside your ears and lift your head, neck, and shoulders off the ground. Keep your feet on the mat.
Hold for 10 seconds (working your way up to longer time periods as you progress).
Bent-Knees Modification
Start lying down with both feet on the mat and your knees bent.
Tuck your pelvis under so your lower back is on the mat. You shouldn’t be able to fit anything between your lower back and the mat.
Lift your legs so your shins are parallel to the floor. Extend both arms alongside your ears and lift your head, neck, and shoulders off the ground.
Hold for 10 seconds (working your way up to longer time periods as you progress).
Hollow Hold Rock
Start by lying down on the floor with your legs extended and your arms long by your sides.
Tuck your pelvis under so your lower back is on the mat. You shouldn’t be able to fit anything between your lower back and the mat.
Start by hovering one leg long, then extend the other leg to join it. After that, extend both arms alongside your ears and lift your head, neck, and shoulders off the ground. Your body should resemble a canoe.
With control, begin rocking your body from side to side and forward and backward without compromising your form. Continue for 10 seconds or as long as you can maintain good form.
Common Mistakes Made in Hollow Hold
The number one no-no of hollow hold? Lifting your back off the ground. “It’s so important to keep your neck long and your lower back connected to the mat,” Olivia says. When you tuck your pelvis under and glue it to the floor, you’re protecting your back and making your core engage. Without this step, hollow hold no longer works your midsection; it hurts your back. So if you find yourself struggling to keep your spine on the ground, try a modification.
Another mistake that’s easy to make is introducing too much tension into your neck. While you want to work the muscles of your upper body, jutting your chin forward may actually cause a neck injury. When you’re performing the move, try to keep your spine in line with the crown of your head. If you feel discomfort or pain in the neck, consider modifying your hollow hold.
How To Add A Hollow Hold To Your Workout
Before you add hollow holds to your next core-strengthening session, consider if the move is right for you. Those with lower back or neck pain should start with a modification like dead bug to strengthen those muscles before moving on to the more advanced version of the move. If you’re pregnant, speak with your doctor about what core work is safe.
Once you’ve determined that hollow holds suit your body, feel free to throw them into your core workouts, strength training routine, or catch them during a class on the Peloton App. Completing just five minutes of core per day, two to three times a week, can lead to better posture, functional fitness, and injury prevention.

Peloton App
Access thousands of classes with no equipment needed.
Related Articles
This content is for informational and educational purposes only and does not constitute individualized advice. It is not intended to replace professional medical evaluation, diagnosis, or treatment. Seek the advice of your physician for questions you may have regarding your health or a medical condition. If you are having a medical emergency, call your physician or 911 immediately.
Level up your inbox.
Subscribe for a weekly dose of fitness, plus the latest promos, launches, and events.
By providing your email address, you agree to receive marketing communications from Peloton.
For more about how we use your information, see our Privacy Policy.


